关于 GitHub Codespaces 在 Visual Studio Code 中的使用
你可以使用你本地安装的 Visual Studio Code 来创建、管理、使用和删除 codespaces。若要在 VS Code 中使用 GitHub Codespaces,你需要安装 Codespaces 扩展。有关在 VS Code 中设置 GitHub Codespaces 的更多信息,请参阅“先决条件”。
默认情况下,如果你在 GitHub 上创建新的 codespace,它将在浏览器中打开。如果你希望自动在 VS Code 中打开所有新的 codespaces,你可以将你的默认编辑器设置为 VS Code。有关更多信息,请参阅“为 GitHub Codespaces 设置默认编辑器”。
如果你更喜欢在浏览器中工作,但仍想继续使用现有的 VS Code 扩展、主题和快捷方式,则可以打开“设置同步”。有关更多信息,请参阅“个性化你的 GitHub Codespaces 帐户”。
先决条件
若要直接在 VS Code 中开发 codespace,你必须安装并使用你的 GitHub 凭据登录 GitHub Codespaces 扩展。GitHub Codespaces 扩展需要 VS Code 2020 年 10 月版本 1.51 或更高版本。
使用 Visual Studio Code Marketplace 安装 GitHub Codespaces 扩展。有关更多信息,请参阅 VS Code 文档中的 扩展市场。
-
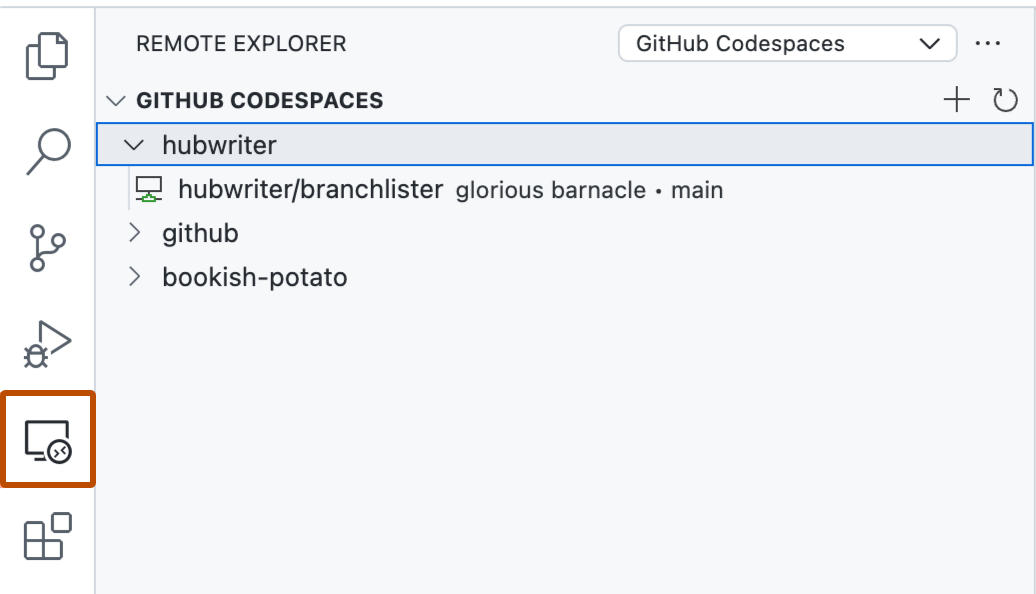
在 VS Code 中,在活动栏中,单击远程资源管理器图标。

注意
如果活动栏中未显示远程资源管理器
- 访问命令面板。例如,按 Shift+Command+P(Mac)/ Ctrl+Shift+P(Windows/Linux)。
- 输入:
details。 - 单击**Codespaces:详细信息**。
-
如果尚未选择,请从“远程资源管理器”侧边栏顶部的下拉列表中选择“GitHub Codespaces”。
-
单击**登录 GitHub**。

-
如果您当前未登录 GitHub,系统会提示您登录。请继续登录。
-
当系统提示您指定要授权的内容时,单击“GitHub”的**授权**按钮。
-
如果显示授权页面,请单击**授权 Visual-Studio-Code**。
在 VS Code 中创建 Codespace
将您的 GitHub 帐户连接到 GitHub Codespaces 扩展后,您可以创建一个新的 Codespace。有关 GitHub Codespaces 扩展的更多信息,请参阅 VS Code Marketplace。
-
在 VS Code 中,在活动栏中,单击远程资源管理器图标。

注意
如果活动栏中未显示远程资源管理器
- 访问命令面板。例如,按 Shift+Command+P(Mac)/ Ctrl+Shift+P(Windows/Linux)。
- 输入:
details。 - 单击**Codespaces:详细信息**。
-
将鼠标悬停在“远程资源管理器”侧边栏上,然后单击.

-
在文本框中,输入您要开发的存储库的名称,然后选择它。

后续提示的右侧会显示一条消息,告知您谁将为 Codespace 付费。

-
单击您要开发的分支。
-
如果系统提示您选择开发容器配置文件,请从列表中选择一个文件。
-
单击您要使用的机器类型。
注意
您可用的机器类型选择可能会受到多种因素的限制。这些因素可能包括为您的组织配置的策略,或存储库的最低机器类型规范。有关更多信息,请参阅“限制对机器类型的访问”和“为 Codespace 机器设置最低规格”。
在 VS Code 中打开 Codespace
-
在 VS Code 中,在活动栏中,单击远程资源管理器图标。

注意
如果活动栏中未显示远程资源管理器
- 访问命令面板。例如,按 Shift+Command+P(Mac)/ Ctrl+Shift+P(Windows/Linux)。
- 输入:
details。 - 单击**Codespaces:详细信息**。
-
在“GitHub Codespaces”下,将鼠标悬停在您要开发的 Codespace 上。
-
单击连接图标(一个插头符号)。

在 VS Code 中更改机器类型
通常,您可以在选择的远程机器类型上运行您的 Codespace。这些机器类型提供了从 2 核到 32 核的硬件规格选择,尽管并非始终都能使用全部范围的机器类型。每种机器类型都具有不同级别的资源和不同的计费层级。有关信息,请参阅“关于 GitHub Codespaces 的计费”。
默认情况下,在您创建 Codespace 时,将使用具有最低有效资源的机器类型。您可以随时更改 Codespace 的机器类型。
注意
您可用的机器类型选择可能会受到多种因素的限制。这些因素可能包括为您的组织配置的策略,或存储库的最低机器类型规范。有关更多信息,请参阅“限制对机器类型的访问”和“为 Codespace 机器设置最低规格”。
-
在 VS Code 中,使用 Command+Shift+P(Mac)或 Ctrl+Shift+P(Windows/Linux)打开命令面板。
-
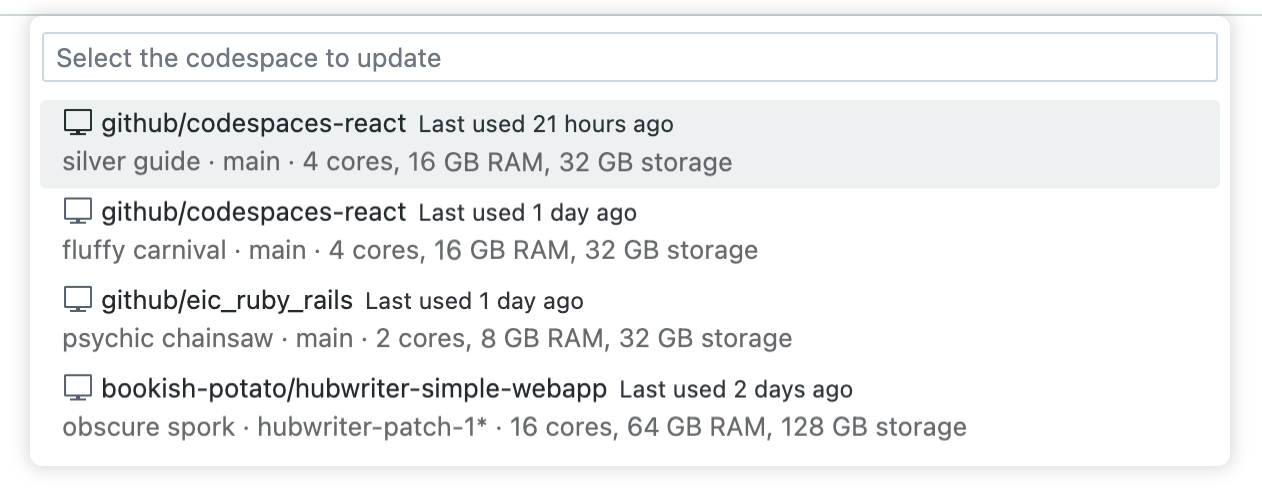
搜索并选择“Codespaces:更改机器类型”。

-
如果您不是在 Codespace 中按照这些说明操作,请单击您要更改的 Codespace。

如果您是在 Codespace 中按照这些说明操作,则更改将应用于您正在使用的 Codespace。
-
选择您要使用的机器类型。
-
如果您要更改为存储容量不同的机器类型,将出现一个提示,询问您是否要继续。阅读提示,然后单击**是**以接受。
如果您更改为存储容量不同的虚拟机(例如,从 32 GB 更改为 64 GB),则在更改机器类型期间,您的 Codespace 将在短时间内不可用。如果 Codespace 当前处于活动状态,它将自动停止。更改完成后,您将能够重新启动在新的机器类型上运行的 Codespace。
如果您更改为存储容量相同的虚拟机,则更改将在您下次重新启动 Codespace 时应用。活动 Codespace 不会自动停止。有关重新启动 Codespace 的更多信息,请参阅“停止和启动 Codespace”。
在 VS Code 中删除 Codespace
当您当前不在 Codespace 中工作时,可以在 VS Code 中删除 Codespace。
-
在 VS Code 中,在活动栏中,单击远程资源管理器图标。

注意
如果活动栏中未显示远程资源管理器
- 访问命令面板。例如,按 Shift+Command+P(Mac)/ Ctrl+Shift+P(Windows/Linux)。
- 输入:
details。 - 单击**Codespaces:详细信息**。
-
在“GitHub Codespaces”下,右键单击您要删除的 Codespace。
-
单击**删除 Codespace**。
在 Web 客户端中切换到 VS Code Insiders
如果您使用的是 VS Code Web 客户端,则可以切换到该应用程序的 Insiders 版本。有关此 VS Code 版本的更多信息,请参阅 VS Code 博客中的 引入 Insiders 版本。
在 Codespace 中切换版本后,如果您停止并重新启动 Codespace,Web 客户端将继续使用 Insiders 版本。您在 VS Code Web 客户端中创建和打开的新 Codespace 也将使用 Insiders 版本。
-
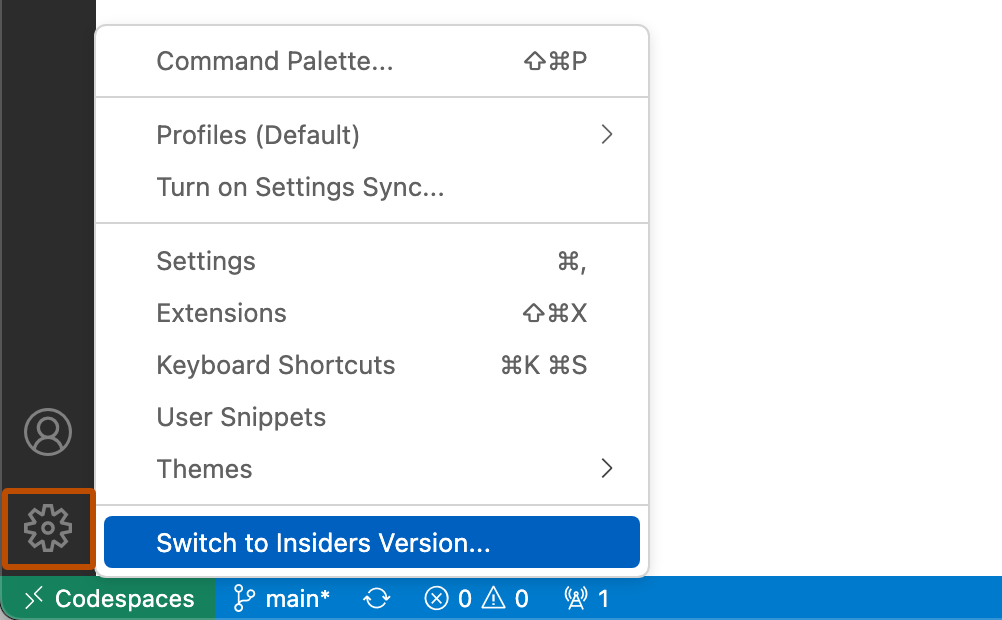
在显示 Codespace 的浏览器窗口的左下方,单击****。
-
在菜单中,选择“切换到 Insiders 版本”。

-
单击**重新加载**。
要切换回 VS Code 的稳定版本,请重复此过程,但选择**切换到稳定版本**。切换回稳定版本后,如果您停止并重新启动 Codespace,则 Codespace 将继续使用稳定版本。您在 VS Code Web 客户端中创建和打开的新 Codespace 也将使用稳定版本。
将 Insiders 桌面应用程序用于 Codespaces
要在 VS Code 桌面应用程序的 Insiders 版本中使用 GitHub Codespaces,请在 VS Code Insiders 应用程序中启动或创建您的 Codespace。有关更多信息,请参阅本文前面部分的“在 VS Code 中创建 Codespace”和“在 VS Code 中打开 Codespace”。