简介
本指南将向您介绍使用 GitHub Codespaces 进行机器学习。您将构建一个简单的图像分类器,了解 GitHub Codespaces 中预安装的一些工具,并了解如何在 JupyterLab 中打开您的 codespace。
构建简单的图像分类器
我们将使用 Jupyter Notebook 来构建一个简单的图像分类器。
Jupyter Notebook 是一组可以依次执行的单元格。我们将使用的 Notebook 包含许多构建使用 PyTorch 的图像分类器的单元格。每个单元格都是该过程的不同阶段:下载数据集、设置神经网络、训练模型,然后测试该模型。
我们将按顺序运行所有单元格,以执行构建图像分类器的所有阶段。当我们这样做时,Jupyter 会将输出保存回 Notebook 中,以便您可以检查结果。
创建 codespace
-
转到 github/codespaces-jupyter 模板存储库。
-
点击**使用此模板**,然后点击**在 codespace 中打开**。
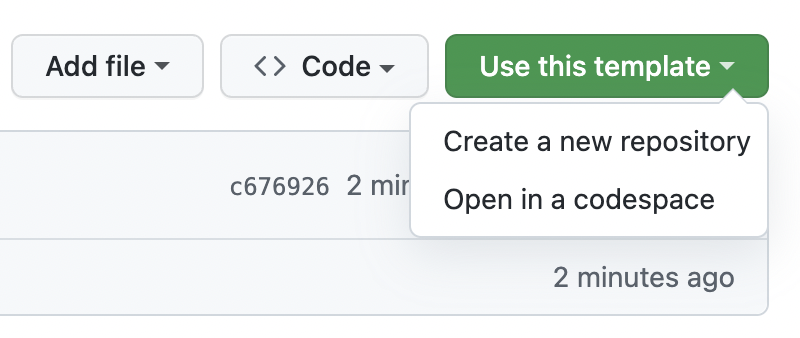

此模板的 codespace 将在 Visual Studio Code 的基于 Web 的版本中打开。
打开图像分类器 Notebook
GitHub Codespaces 使用的默认容器镜像预安装了一组机器学习库,这些库会在您的 Codespace 中可用。例如,Numpy、pandas、SciPy、Matplotlib、seaborn、scikit-learn、Keras、PyTorch、Requests 和 Plotly。有关默认镜像的更多信息,请参阅“开发容器简介”和devcontainers/images 存储库。
- 在 VS Code 编辑器中,关闭显示的任何“入门”选项卡。
- 打开
notebooks/image-classifier.ipynb笔记本文件。
构建图像分类器
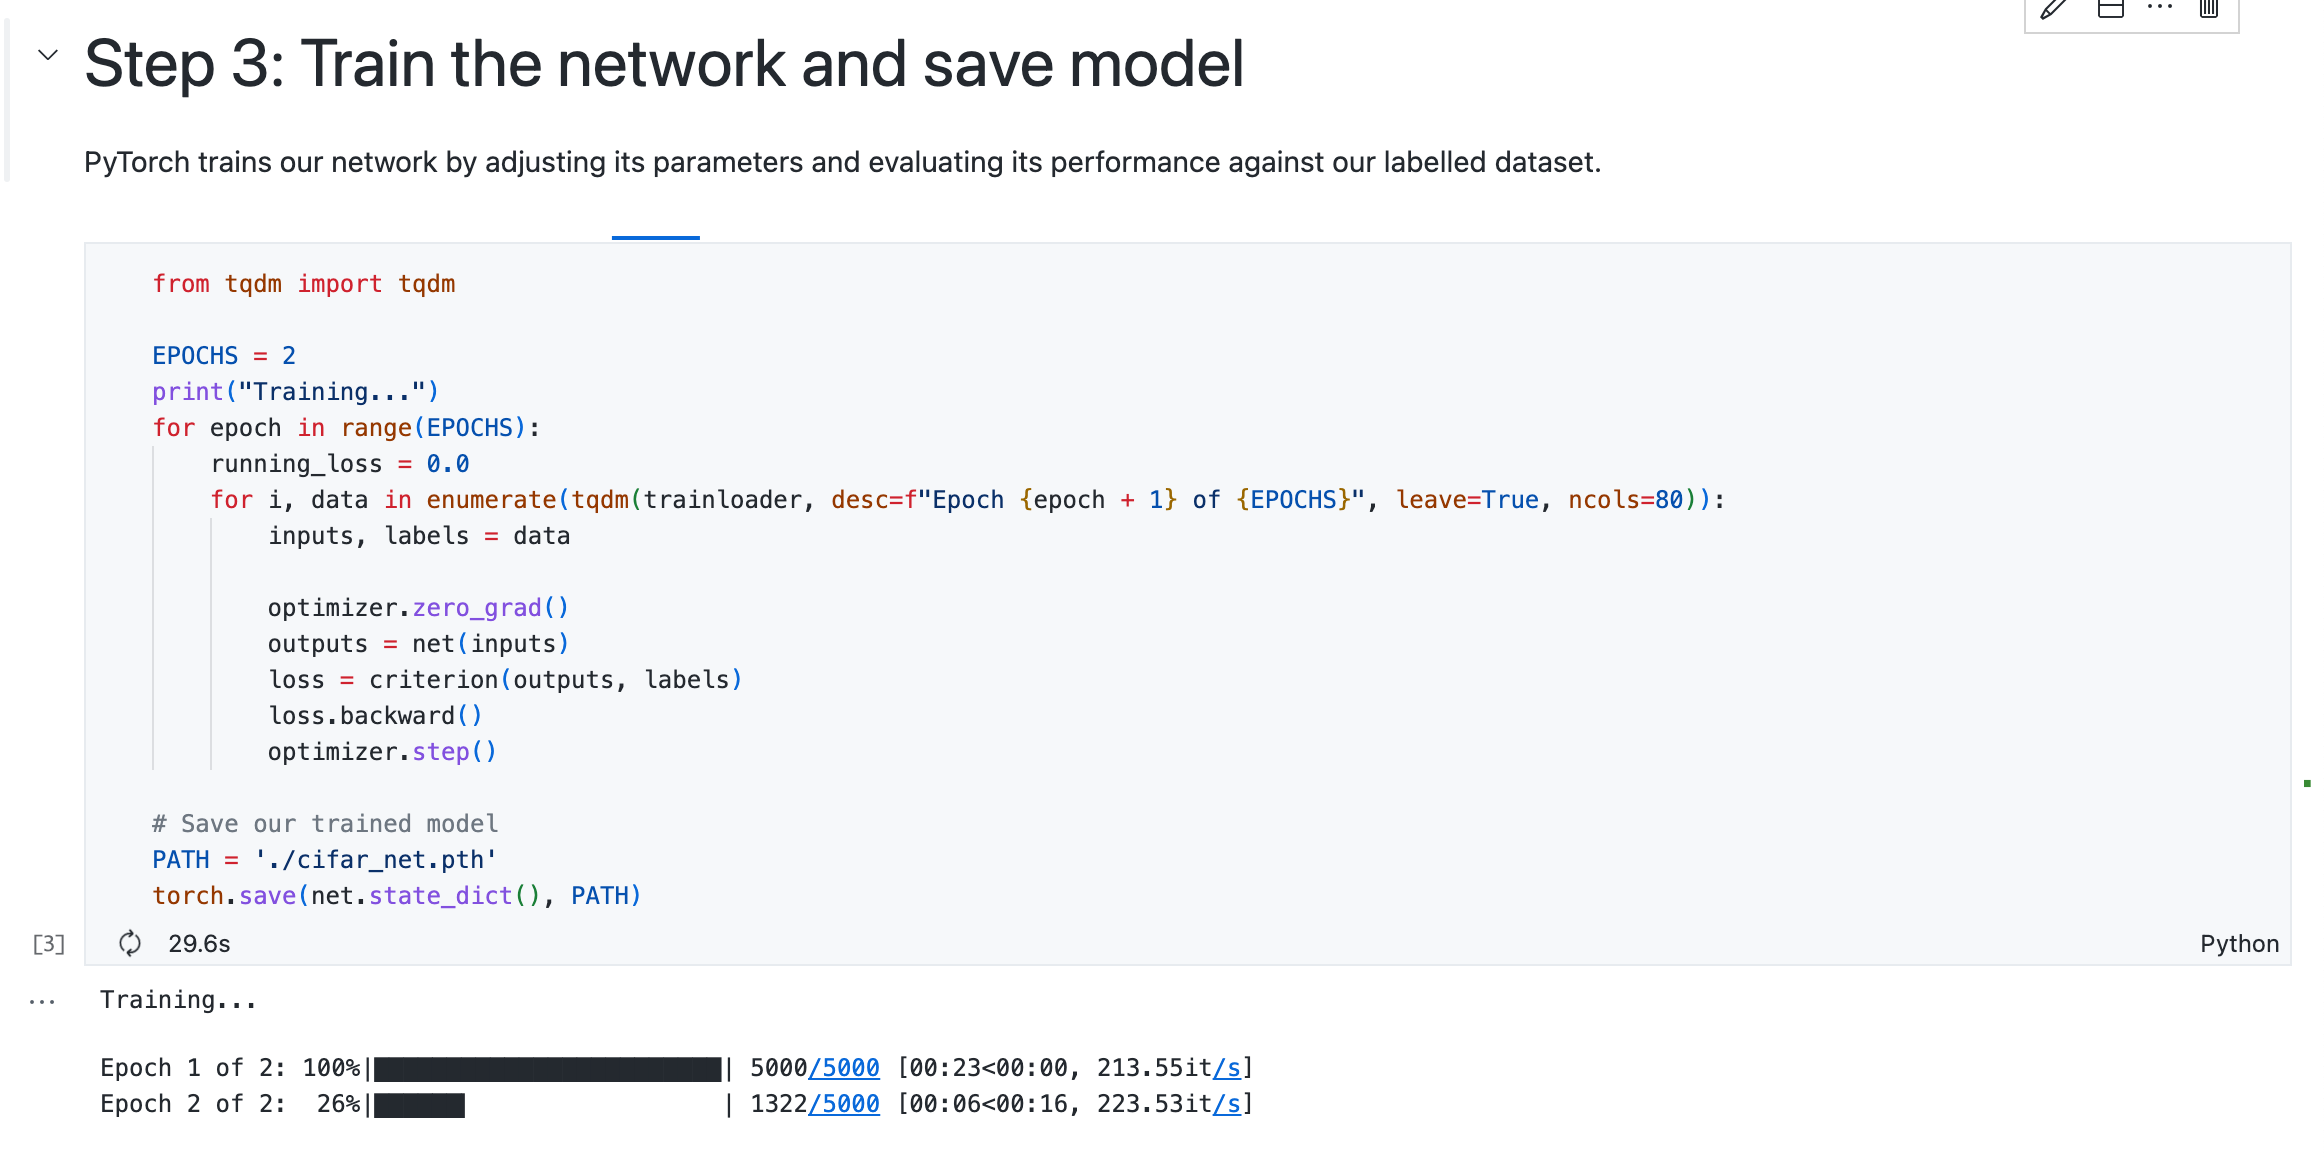
图像分类器笔记本包含下载数据集、训练神经网络和评估其性能所需的所有代码。
-
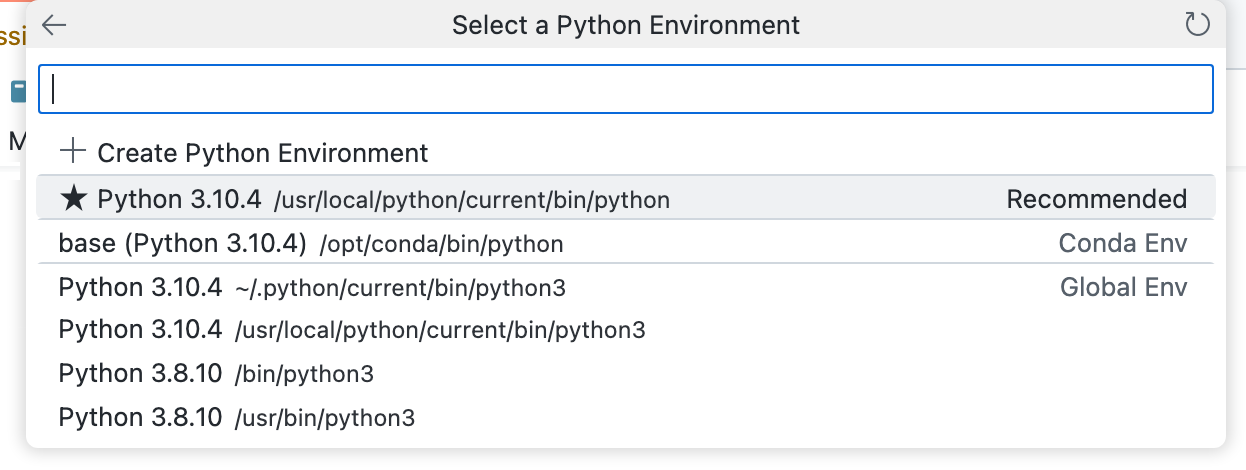
单击**全部运行**以执行笔记本中的所有单元格。

-
如果系统提示您选择内核源,请选择**Python 环境**,然后选择推荐位置的 Python 版本。
-
向下滚动以查看每个单元格的输出。


在 JupyterLab 中打开您的 Codespace
您可以从 github.com/codespaces 上的“您的 Codespaces”页面或使用 GitHub CLI 在 JupyterLab 中打开您的 Codespace。有关更多信息,请参阅“打开现有 Codespace”。
您要打开的 Codespace 中必须安装 JupyterLab 应用程序。默认开发容器镜像包含 JupyterLab,因此从默认镜像创建的 Codespace 将始终安装 JupyterLab。有关默认镜像的更多信息,请参阅“开发容器简介”和devcontainers/images 存储库。如果您在开发容器配置中未使用默认镜像,则可以通过将ghcr.io/devcontainers/features/python功能添加到您的devcontainer.json文件中来安装 JupyterLab。您应该包含选项"installJupyterlab": true。有关更多信息,请参阅devcontainers/features存储库中python功能的 README。
为您的 Codespace 配置 NVIDIA CUDA
注意
本节仅适用于可以在使用 GPU 的机器上创建 Codespace 的客户。在试用期内,已向选定的客户提供了选择使用 GPU 的机器类型的功能。此选项通常不可用。
某些软件需要您安装 NVIDIA CUDA 才能使用 Codespace 的 GPU。在这种情况下,您可以使用devcontainer.json文件创建自己的自定义配置,并指定应安装 CUDA。有关创建自定义配置的更多信息,请参阅“开发容器简介”。
有关在添加nvidia-cuda功能时运行的脚本的完整详细信息,请参阅devcontainers/features存储库。
-
在 Codespace 中,在编辑器中打开
.devcontainer/devcontainer.json文件。 -
添加一个具有以下内容的顶级
features对象JSON "features": { "ghcr.io/devcontainers/features/nvidia-cuda:1": { "installCudnn": true } }"features": { "ghcr.io/devcontainers/features/nvidia-cuda:1": { "installCudnn": true } }有关
features对象的更多信息,请参阅开发容器规范。如果您正在使用为此教程创建的图像分类器存储库中的
devcontainer.json文件,则您的devcontainer.json文件现在将如下所示{ "customizations": { "vscode": { "extensions": [ "ms-python.python", "ms-toolsai.jupyter" ] } }, "features": { "ghcr.io/devcontainers/features/nvidia-cuda:1": { "installCudnn": true } } } -
保存更改。
-
访问 VS Code 命令面板(Shift+Command+P / Ctrl+Shift+P),然后开始键入“重建”。单击**Codespaces:重建容器**。

提示
您可能偶尔需要执行完全重建以清除缓存并使用新镜像重建容器。有关更多信息,请参阅“重建 Codespace 中的容器”。Codespace 容器将被重建。这将需要几分钟。重建完成后,Codespace 会自动重新打开。
-
将您的更改发布到存储库,以便将来从此存储库创建的任何新 Codespace 中都将安装 CUDA。有关更多信息,请参阅“从模板创建 Codespace”。
